HomeGuard Installation
Installation
After downloading and running the HomeGuard setup program, you will be presented with these steps:
1. Choose Install Location:

This folder will be protected, no files can be moved or deleted from it unless you use your password to stop or uninstall HomeGuard.
2. Choose a password:
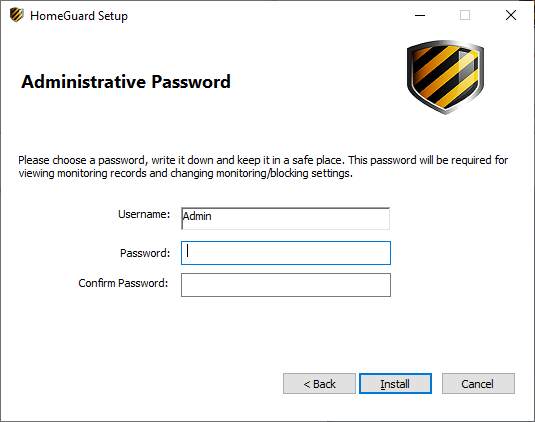
Choose a password and type it again to confirm, then click "Install".
3. Installation Complete
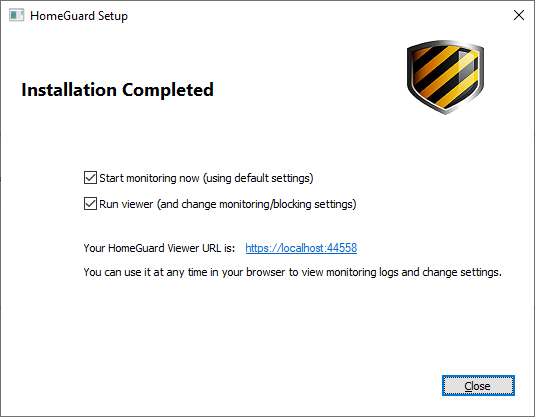
Installation is now complete. Leave the "Start Monitoring Now" box check to activate monitoring immediately after closing setup. And leave the "Run Viewer" box checked to have setup open HomeGuard dashboard automatically after closing it, so that you can review or change any default settings.
4. Next Steps: Changing Settings or Viewing Monitoring Logs
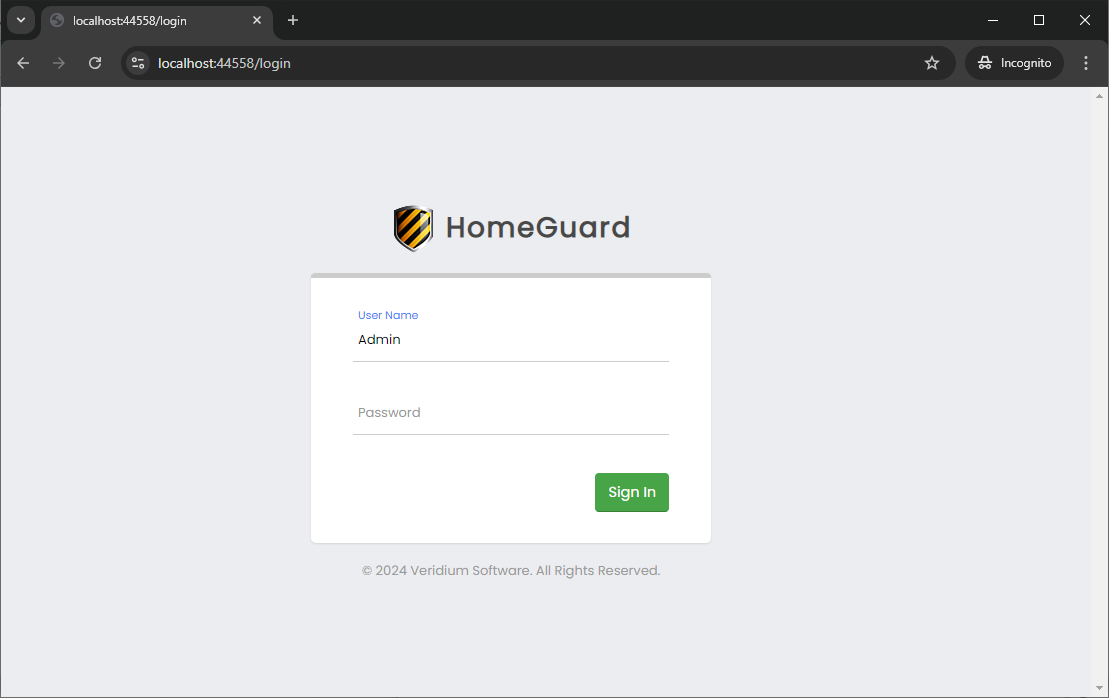
You change monitoring and blocking settings or view monitoring logs at any time by just opening any browser window and going to HomeGuard's dashboard URL: https://localhost:44558
You'll be asked to log in using your Admin username and password (chosen during installation).